The WordPress Block Editor aka Gutenberg is a stable part of WordPress now for some time. This React based editor comes with some additional components you can also use outside of the post edit screen. You could even use them outside of WordPress but for my personal use case I needed to use it on our plugins options page.
WP HTML Mail – Email Customizer
Our plugin has been written years before React got part of WordPress maybe even years before React existed. So our settings pages have been PHP files with a little bit of jQuery which was absolutely state of the art.
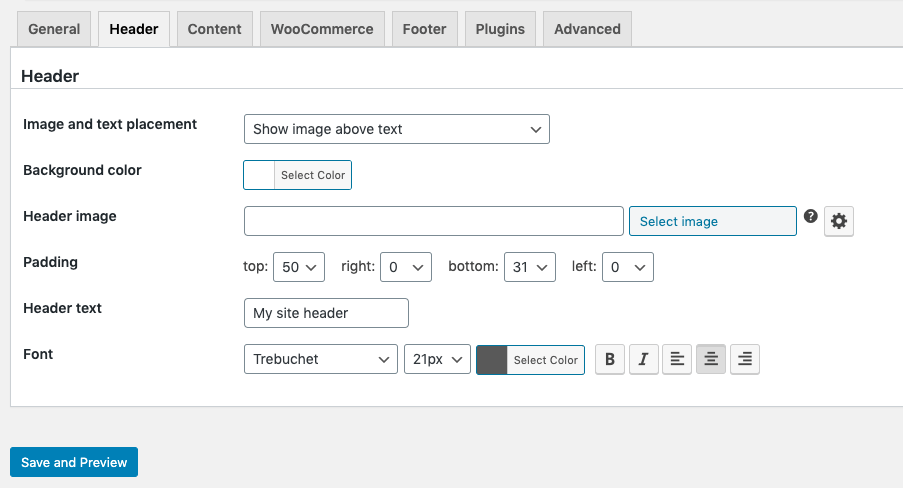
Over the years we added some features and the settings pages got bigger and bigger and not very user friendly anymore so we decided to create a template designer in React to replace the existing pages.
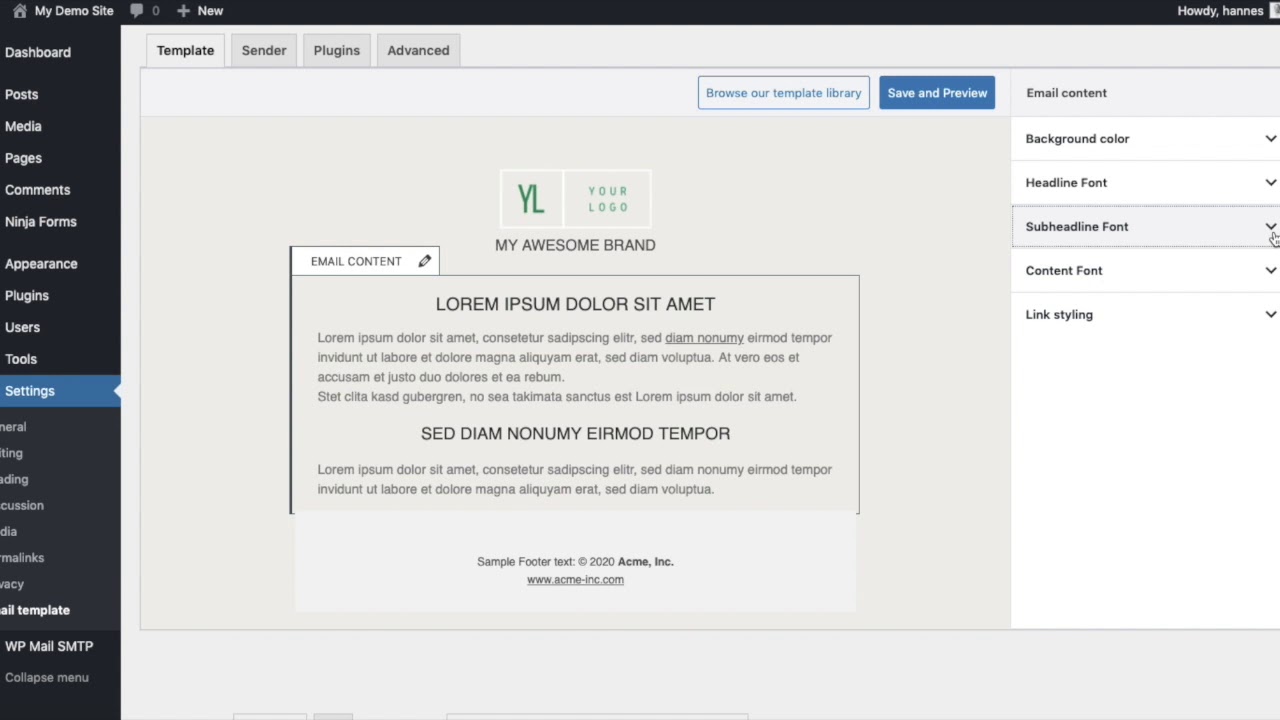
The result of our new editor for WP HTML Mail
By loading the video, you agree to YouTube’s privacy policy.
Learn more
WordPress React Components @wordpress/components
The react components library doesn’t seem to be very popular until now. Google didn’t tell me much about it and the documentation is also not very detailed (at least compared to the MaterialUI documentation I use in other React projects).
So how to get started?
Start with your preferred webpack babel setup and then install @wordpress/components
npm install @wordpress/components --saveThe default behavior of webpack is to bundle everything to a single JS file but as we know these components are globally available (depending on the WordPress version) we can add all of them as externals. To simplify this step there’s a dependency extraction webpack plugin for WordPress.
Without this plugin my bundles JS file was about 7MB in DEV mode and about 3MB in DIST mode after the installation it is 390KB and 35KB.
This webpack plugin creates a .asset.php file for each of your bundled JS files. For example main.asset.php for our main.js. This file can be used to enqueue our scripts with dependencies:
$script_path = HAET_MAIL_PATH
        . 'js/template-designer/'
        . ( $this->isScriptDebug() ? 'dev' : 'dist' )
        . '/main.js';
$script_asset_path = HAET_MAIL_PATH
        . 'js/template-designer/'
        . ( $this->isScriptDebug() ? 'dev' : 'dist' )
        . '/main.asset.php';
$script_asset = file_exists( $script_asset_path )
        ? require( $script_asset_path )
        : array(
            'dependencies' => array(),
            'version' => filemtime( $script_path )
        );
$script_url = HAET_MAIL_URL
        . 'js/template-designer/'
        . ( $this->isScriptDebug() ? 'dev' : 'dist' )
        . '/main.js';

wp_enqueue_script(
        'wp-html-mail-template-designer',
        $script_url,
        $script_asset['dependencies'],
        $script_asset['version']
);How we load and save settings with React in WordPress Admin
I made one lucky decision a few years ago and saved all theme settings of WP HTML Mail to one array. Nowadays I can use this array as a JSON to keep backwards compatibility to settings saved in previous versions.
Using the WP REST API we can get and update this settings now from our React component.
This is a simplified version of our plugin code.
Step 1 PHP: passing the REST URL to JavaScript
to add PHP variables to JS we use wp_localize_script. This function passes the variable mailTemplateDesigner to JS.
wp_localize_script(
    'wp-html-mail-template-designer',
    'mailTemplateDesigner',
    [
        'restUrl' => get_rest_url( null, 'whm/v3' )
    ]);
Step 2 PHP: Register custom REST endpoints
We register two REST endpoints both called “themesettings” one to get and one to update the settings
public function rest_api_init() {
  register_rest_route( 'whm/v3', '/themesettings', array(
    'methods' => 'GET',
    'callback' => [ $this, 'getThemeSettings' ]
  ));

  register_rest_route( 'whm/v3', '/themesettings', array(
    'methods' => 'POST',
    'callback' => [ $this, 'saveThemeSettings' ]
  ));
}

public function getThemeSettings() {
  return get_option('haet_mail_theme_options');
}

public function saveThemeSettings( $request ){
  if( $request->get_params() ){
    $theme_options = $request->get_params();
    update_option('haet_mail_theme_options', $theme_options);
  }
}

// in the constructor of you class add this action:
add_action( 'rest_api_init', [ $this, 'rest_api_init' ] );
Step 3 React: load Plugin settings via API
In our React Component we load our setting from the “themesettings” REST endpoint.
The mailTemplateDesigner variable we passed from PHP to JS above is now globally available and contains our restUrl.
const loadSettings = () => {
  fetch(window.mailTemplateDesigner.restUrl + "themesettings")
  .then((resp) => resp.json())
  .then((data) => {
    console.log( data );
  });
};

useEffect(() => {
  loadSettings();
}, []);
Step 4 React: Save Settings from React via REST Api
const saveSettings = (settings) => {
  var request = new Request(
    window.mailTemplateDesigner.restUrl + "themesettings",
    {
      method: "POST",
      body: JSON.stringify(settings),
      headers: { "Content-Type": "application/json" },
    }
  );
  fetch(request)
    .then((resp) => resp.json())
    .then((data) => {
      // do something after you saved your settings
    });
};
Structure you React components
I don’t write any details about how to write react code but as we have one global array of settings we use a context to make these settings available in all subcomponents.
If you want to see it in action follow the TemplateDesignerContext in our source code on GitHub.
Using the @wordpress/components
Let’s start with the core topic of this post. How did we use WordPress React components?
First of all we have to import dependencies for each file. This could look like this:
import { useState, useEffect, useContext } from "@wordpress/element";
import { Panel, PanelBody, PanelRow } from "@wordpress/components";
import { more } from "@wordpress/icons";
import { Card, CardBody } from "@wordpress/components";
import { BaseControl } from "@wordpress/components";
import { ColorPicker } from "@wordpress/components";
import { FontSizePicker } from "@wordpress/components";
import { __ } from "@wordpress/i18n";
Please note we import useState, useEffect, useContext from @wordpress/element instead of React and the last line is also very interesting, it allows us to use the translation function “__” as we do normally in PHP.
Here’s a screenshot of our email editor. The left part is our custom code but the options panel on the right consists of ready to use components.
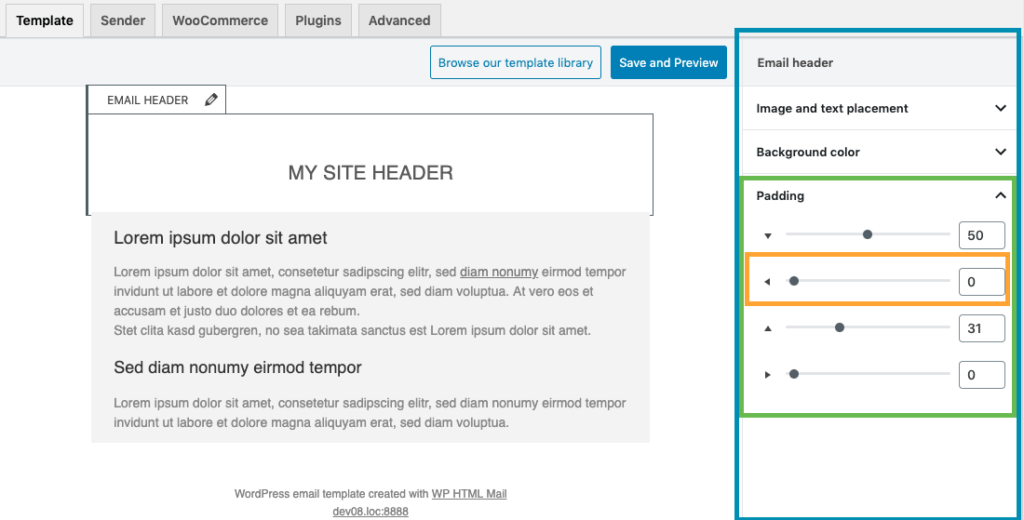
- blue is the <Panel> component
- containing three <PanelBody> components (green) the last one is currently open so we can see
- four <PanelRow> components (orange)
- each of them containing a <RangeControl>
The Panel Component
The panel component is this kind of sidebar you see in WordPress while you write you blog posts. Our Code for the panel looks like this:
<Panel
    header="Email header"
    className="mail-optionspanel"
  >
  ... here comes the content
</Panel>
Without some PanesBodies inside its pretty useless so we expand it right now.
PanelBody and PanelRow components
<Panel
    header="Email header"
    className="mail-optionspanel"
  >
  <PanelBody
      title={__("Image and text placement", "wp-html-mail")}
      initialOpen={true}
    >
    <PanelRow>
      Hello world
    </PanelRow>
  </PanelBody>
</Panel>
We have our first settings group which can be collapsed and looks like your Gutenberg sidebar without writing any additional line of code.
Inside the PanelRow we add out settings now. In our plugin we have a variable called settings and we update these setting via updateSetting.
Using the RadioControl component
The <RadioControl> component is just a React wrapper for a HTML <input type=”radio”….>
Please pay attention to the “__” function in the labels which allows us to translate strings afterwards.
<PanelRow>
  <RadioControl
    selected={my_setting_key}
    options={[
      {
        value: "option_a",
        label: __(
          "Translatable name of option A",
          "wp-html-mail"
        ),
      },
      {
        value: "option_b",
        label: __(
          "Translatable name of option B",
          "wp-html-mail"
        ),
      },
    ]}
    onChange={(value) => {
      updateSetting(
        "my_setting_key",
        value
      );
    }}
  />
</PanelRow>
That’s all I need, no splitting between PHP, HTML and JS everything encapsulated in one component. For most of the components you wont even need to customize the CSS.
The ColorPicker Component
Same situation as above, we get the setting from the settings variable and update via updateSettings
<ColorPicker
  color={settings.my_color}
  onChangeComplete={(value) => {
    updateSetting(
      "my_color",
      value.hex
    );
  }}
  disableAlpha
/>
The Range Control Component
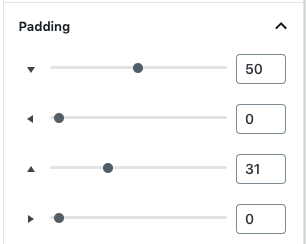
The last example I’m going to demonstrate here is the RangeComponent because it also uses Icons available in the WordPress backend. The only thing I had to do is writing the name of the dashicon.
<RangeControl
  beforeIcon="arrow-down"
  value={settings.paddingtop}
  onChange={(value) => {
    templateDesignerContext.updateSetting(
      "paddingtop",
      value
    );
  }}
  min={0}
  max={100}
/>